Exporting a transcript to PTX format may allow your client to open the file using RealLegal E-Transcript Viewer and/or RealLegal E-Transcript Bundle Viewer. In CATalyst, you can set up themes for different clients, which includes Company Info, Print Headers and Splash Screen information. If you use Case CATalyst fields in the transcript, those field values will be used as suggestions in the Job Info/Properties dialog box in RealLegal's viewers. If the CATalyst transcript layout includes timestamps, you can select to export the timestamps also. There are PTX fields that can be used in the themes to automatically fill in Header/Footer information along with the Splash Screen information. Themes are saved in the PTX Themes case in the System Files case.
Export to PTX is available via the Export (Alt-u, x) dialog box and at Manage Jobs, by right clicking a transcript and selecting Export to PTX.
Export PTX/Create PTX (E-Transcript Files)
From Manage Jobs click Function, Export (Alt-u, x).
-
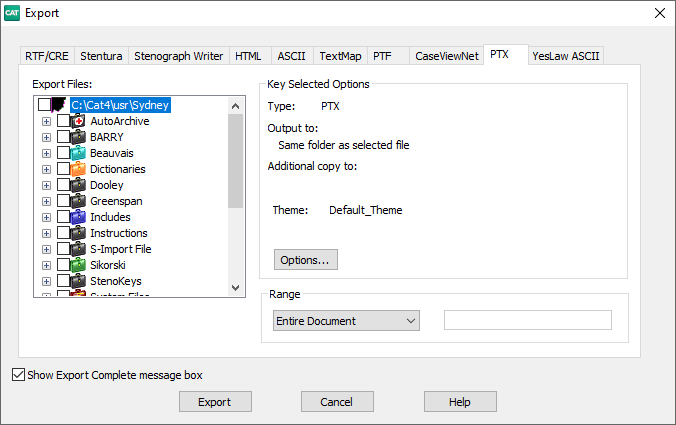
The dialog box will display, click on PTX tab if it is not already selected.
-
On the left side of the dialog, under Export Files, check each job you want to make a PTX file.
Under Range select the range of pages for which you want to create the PTX. Your options are Entire Document, Section, or Selected Pages.
Check the Show Export Complete message box: to display the message, Export Complete, when CATalyst completes the export. Uncheck the box to prevent the display of the Export Complete message.
-
Click Options if you need to change any options. Otherwise click Export to create the PTX file.
PTX Options
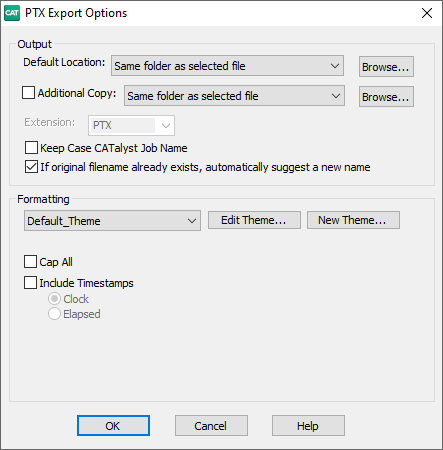
Output
Default Location: This is where the PTX file will be saved. The default option is Same folder as selected file. To change the location click the Browse button.
Additional Copy: Check this box to create an additional copy of the PTX export file. The default option is Same folder as selected file. To change the location click the Browse button.
Extension: The field is grayed out and cannot be changed.
Keep CATalyst Job Name: Check this box to keep the original CATalyst file name when you export the file.
If original filename already exists, automatically suggest a new name: Check this box to have CATalyst automatically suggest a new file name to the exported file if it detects that the file name already exists on the destination location. For example, if you are importing the Smith file and the Smith file already exists, Case CATalyst suggests Smith 1.
Formatting
Default Theme: You can create different themes for different clients or requirements. Once you save and name the theme, it will be listed in the drop-down list. To select a theme, click the down arrow and select the theme.
Edit Theme...: Allows you to make changes to the default information sent with the PTX file or make changes to the currently displayed theme.
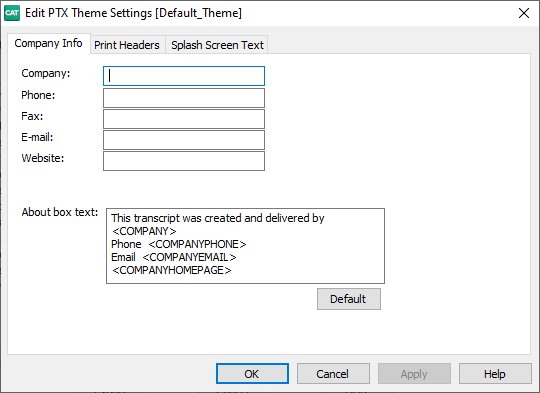
There are three tabs to a theme:
Company Info: Input your name or firm name along with contact information. This information displays if the user attempts to perform a function that is locked out and Firm Name field value displays when you select Properties in the viewing software.
Print Headers: Customize the PTX header and footer information with fields and/or static text. The headers and footers display on the full-size transcript and/or condensed version.
Splash Screen Text: Customize an optional splash screen with fields or static text. The Splash Screen displays when the file is opened in the viewer. The user will need to click I Accept to continue.
On each tab, there are places where you can use "fields" to fill in variables. For example, you may use <COMPANY> and/or <COMPANYPHONE> to display the information contained in the Company and Phone fields. Some values for these fields will be filled in once you select a file to export.
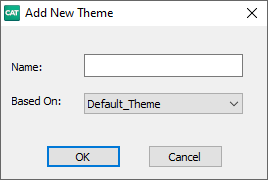
New Theme...: Allows you to set up different themes for different clients. Select New Theme, type a name and select an existing theme to which you want the new theme based. Once a new theme is created, you can customize the theme using Edit theme.
Cap All: Check this box if you want the text in the PTX file to appear in all capital letters.
Include Timestamps: Check the Include Timestamps box and then either Clock or Elapsed option to have the PTX exported transcript include timestamps. The CATalyst transcript layout must have timestamps selected.
Delete -
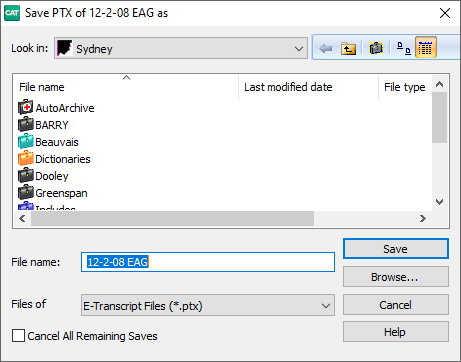
Click Export. If the destination location contains a PTX file with the same name as the PTX file you are creating, the Save As dialog box displays. Depending on your Export Options, CATalyst suggests a name based on the original file name. Save the suggested name or type a name in the File name field and click Save.
-
The PTX Job Info dialog box displays. Select the appropriate options and/or fill in any of the following text fields.
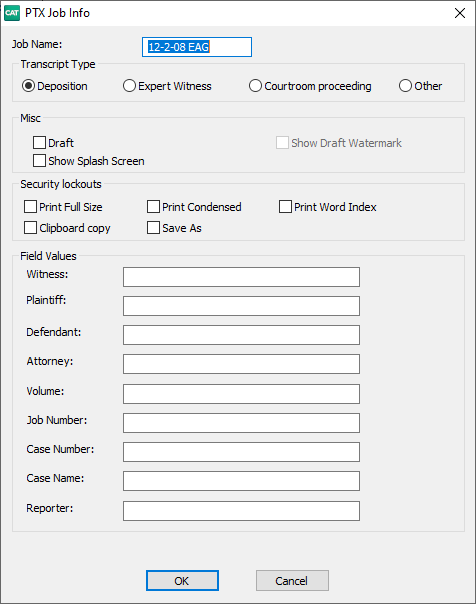
Job Name: Type the name of the file or use the current name displayed in the field.
Transcript Type: Chose from Deposition, Expert Witness, Courtroom proceeding or Other.
Misc.: Select either of the miscellaneous options of Draft or Show Splash Screen. If selected, the information designated in the splash screen tab of the selected theme display when a client opens the PTX.
Security lockouts: Select any of the available functions to prevent the client from performing the action. Print Full Size, Print Condensed, Print Word Index, Clipboard copy and Save As features are available for lockout.
Important: If you select to use any of the lockout features and the client attempts to perform one of the lockout functions, the client may be prompted for a Unlock code. Case CATalyst does not provide a unlock code. You can either create another PTX without that feature locked out or not allow the client to perform the function.
Field Values: Using fields in a transcript that exactly match the PTX <> fields will allow CATalyst field value to be used as a suggestion during the PTX export of the file. For example, if you use the PTX <WITNESS> field and you have a {!WITNESS] field in the transcript, the value of the CATalyst field will be suggested in the Witness field. NOTE: If you have an [!INTERVIEWER] in CATalyst, Export to PTX will use that value. If the <INTERVIEWER> field is empty, PTX will use the value of the [!ATTORNEY] field.
When finished making your selections, click OK.
Once the transcript is opened in either the RealLegal E-Transcript Viewer™ and/or RealLegal E-Transcript Bundle Viewer™, the timestamp setting in the PTX viewer will need to be selected to display timestamps and positioning of the timestamps.