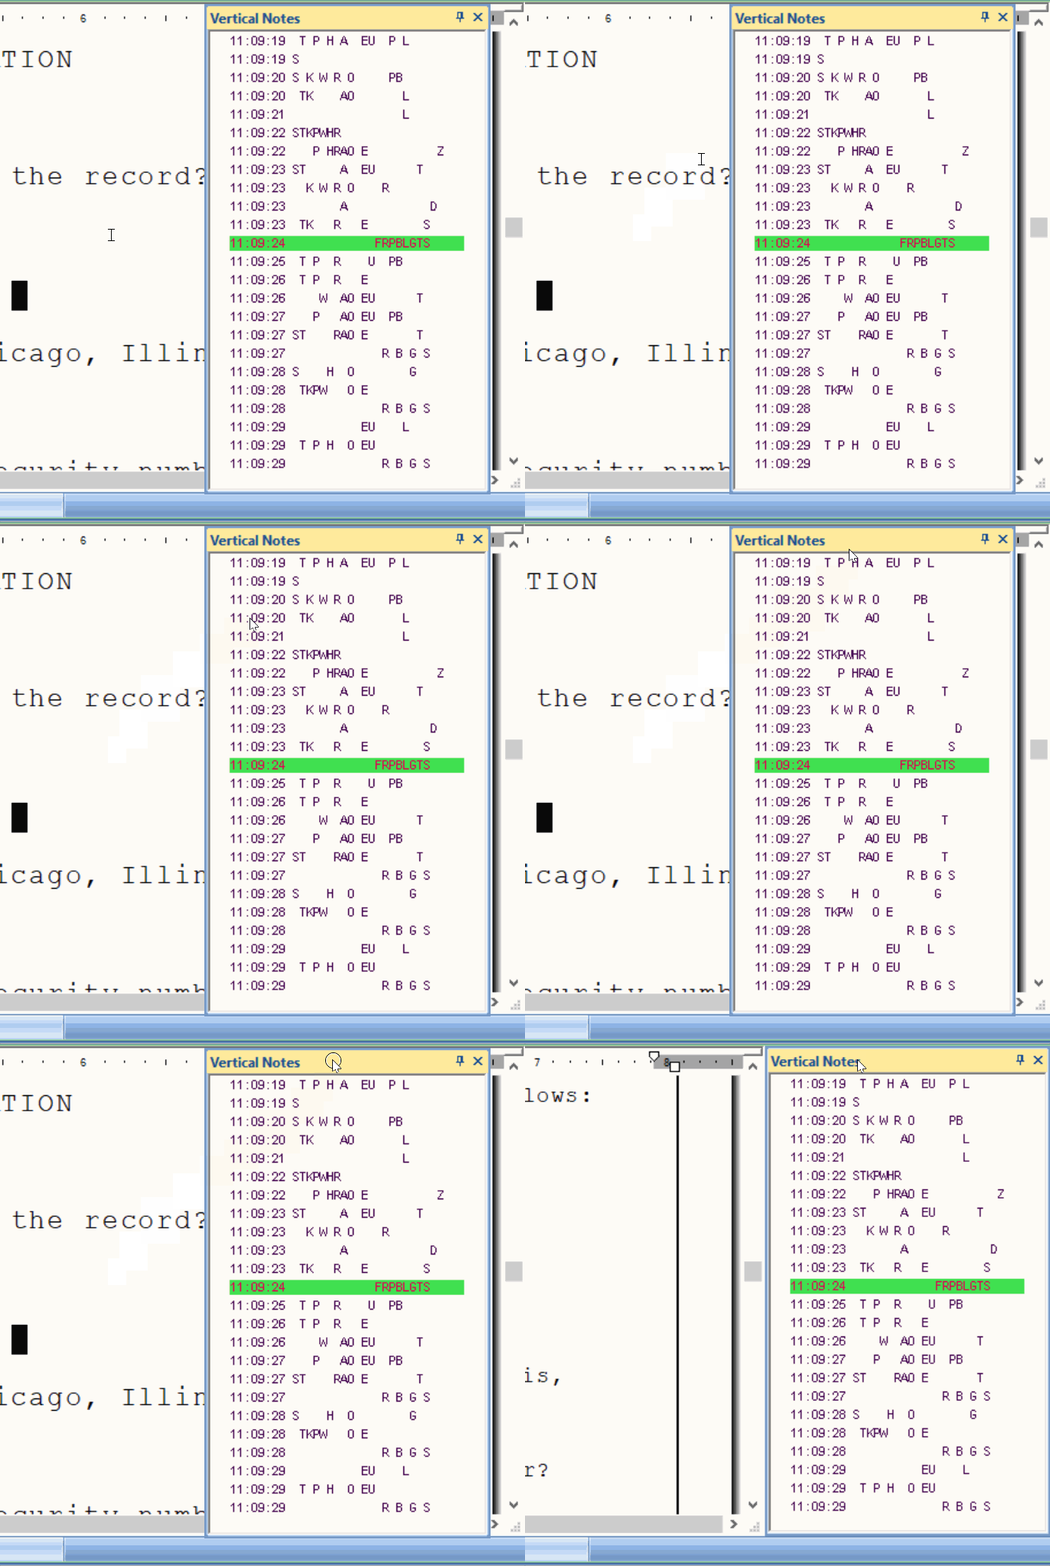
Dialog panes are small self contained resizable windows that display in a fixed position on the Case CATalyst screen. Case CATalyst features, such as Reveal Codes, Vertical Notes, EZ Text, Speaker List, Hidden Text, Hotspots, Clipboard, Brief It, Cat Scratch, Search Results, Track Changes, and Connected Users can appear as dialog panes.
Each pane is customizable. They can be moved anywhere on the screen either as a "docked" or "floating" pane, resized to make it wider, or even hidden as a tab only to appear when you move the mouse over the tab.
Note: While you can have as many or as few panes as you'd like in Edit, keep in mind that the more panes on the screen, the smaller the transcript looks. Set panes you don't use often as hidden or as shared tabs so they take up less screen space.
To display a closed dialog pane, click View/Panes (Alt + v, e) and then select a pane from the submenu. A check mark shows next to the feature to indicate it is displayed. To close a dialog pane, click the X in the title bar or deselect it from the View/Panes submenu.
A fixed position is indicated by the vertical push pin  on the Title bar of the pane. You can easily click and drag the pane to a new vertical or horizontal position, change it to a floating pane or store the pane as an auto hide tab along the edge of the screen.
Sizing Dialog Panes
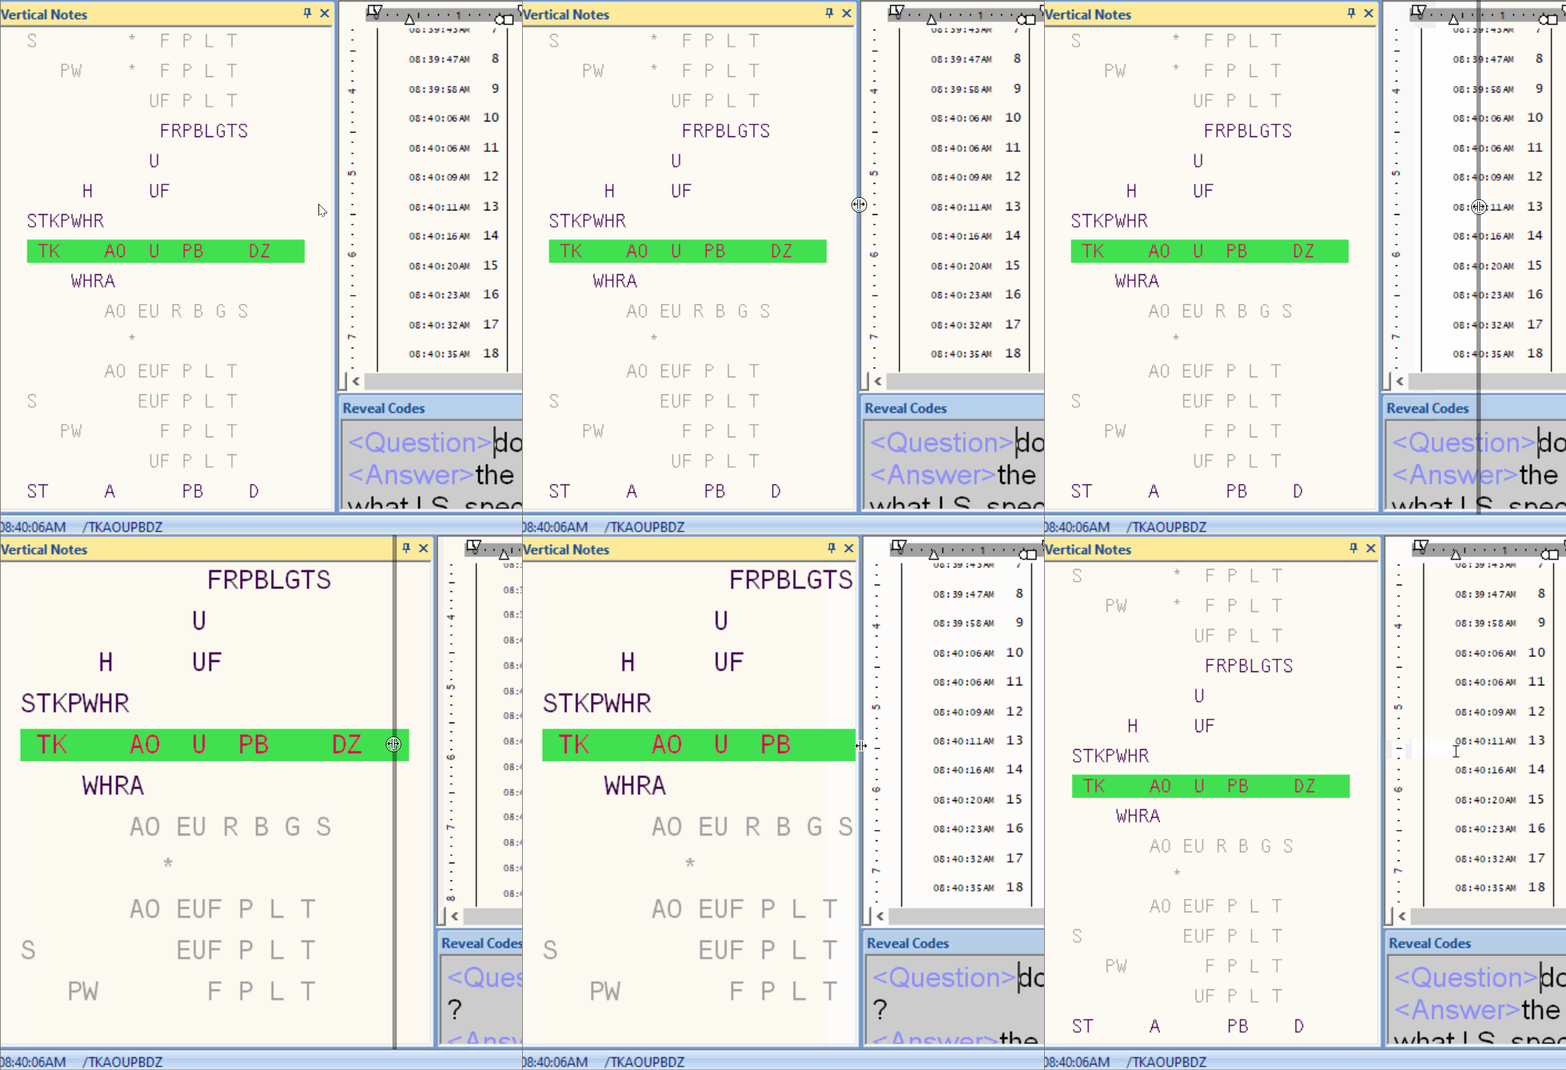
To increase or decrease the horizontal size of a pane, position your cursor on the free edge (a side that is available to move) of the pane, your cursor will change to a horizontal double arrow (cross arrow to increase pane size). Hold down the left mouse button and drag the edge to the horizontal position you want. Then release the left mouse button.
Auto Hide Dialog Panes
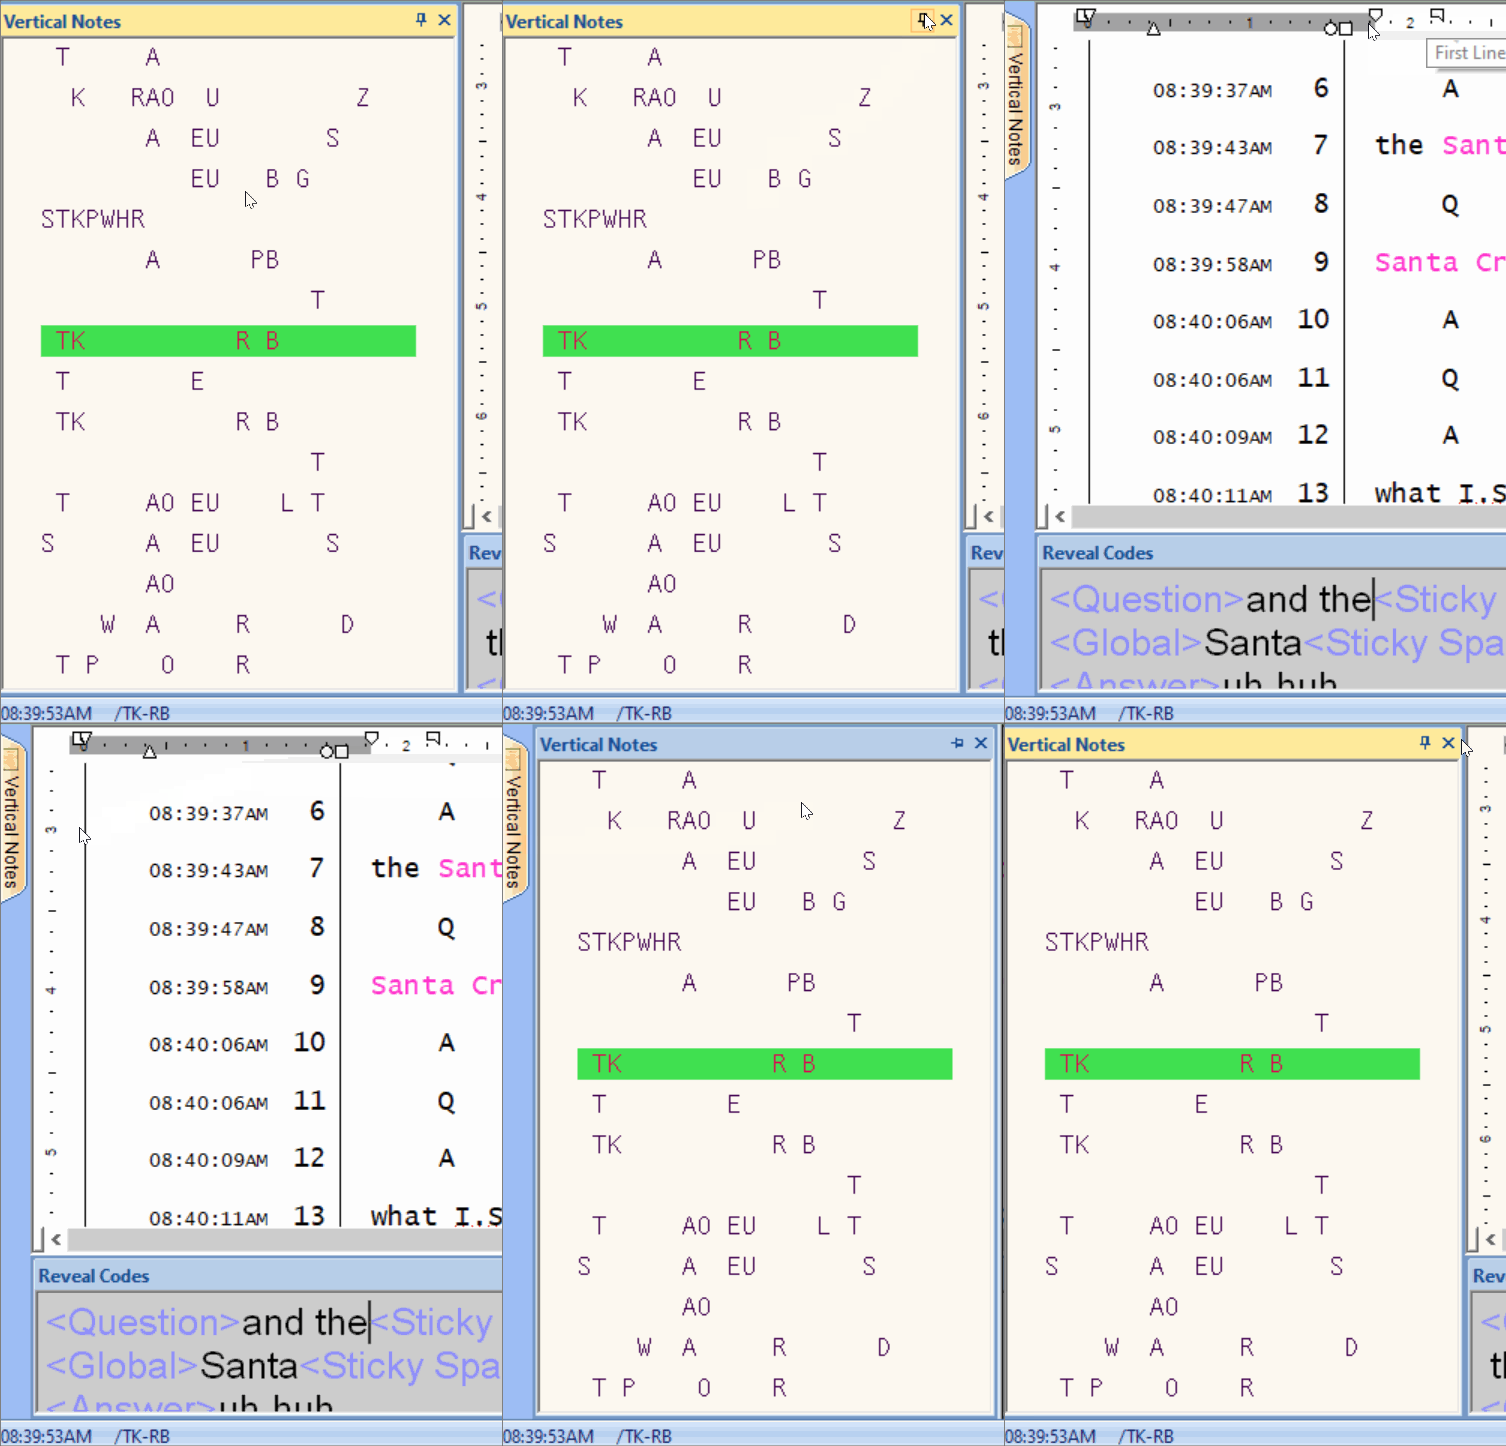
Dialog panes in auto hide mode quickly display when you hover your cursor on the auto hide tab. To auto hide a pane, click the push pin  on the title bar of a dialog pane, changing it to a horizontal position
  . The horizontal position indicates the pane is in auto hide mode. Move the cursor off the pane to hide it as a tab along the edge of the Case CATalyst screen. Hover the cursor over or click the tab to temporarily display the pane. To return the pane to the fixed position on the screen, click the push pin from a horizontal to vertical position.
Reposition Dialog Panes
A fixed or "docked" pane and a floating pane can be repositioned. You cannot reposition a pane that is in AutoHide mode. The Title bar of a dialog pane with a vertical push pin push_pin_down indicates the pane is in a "docked position. To return a dialog pane from AutoHide to a docked position, hover the cursor on the auto hide tab. When the pane displays, double click the Title bar of the pane or click the push pin to a vertical position.
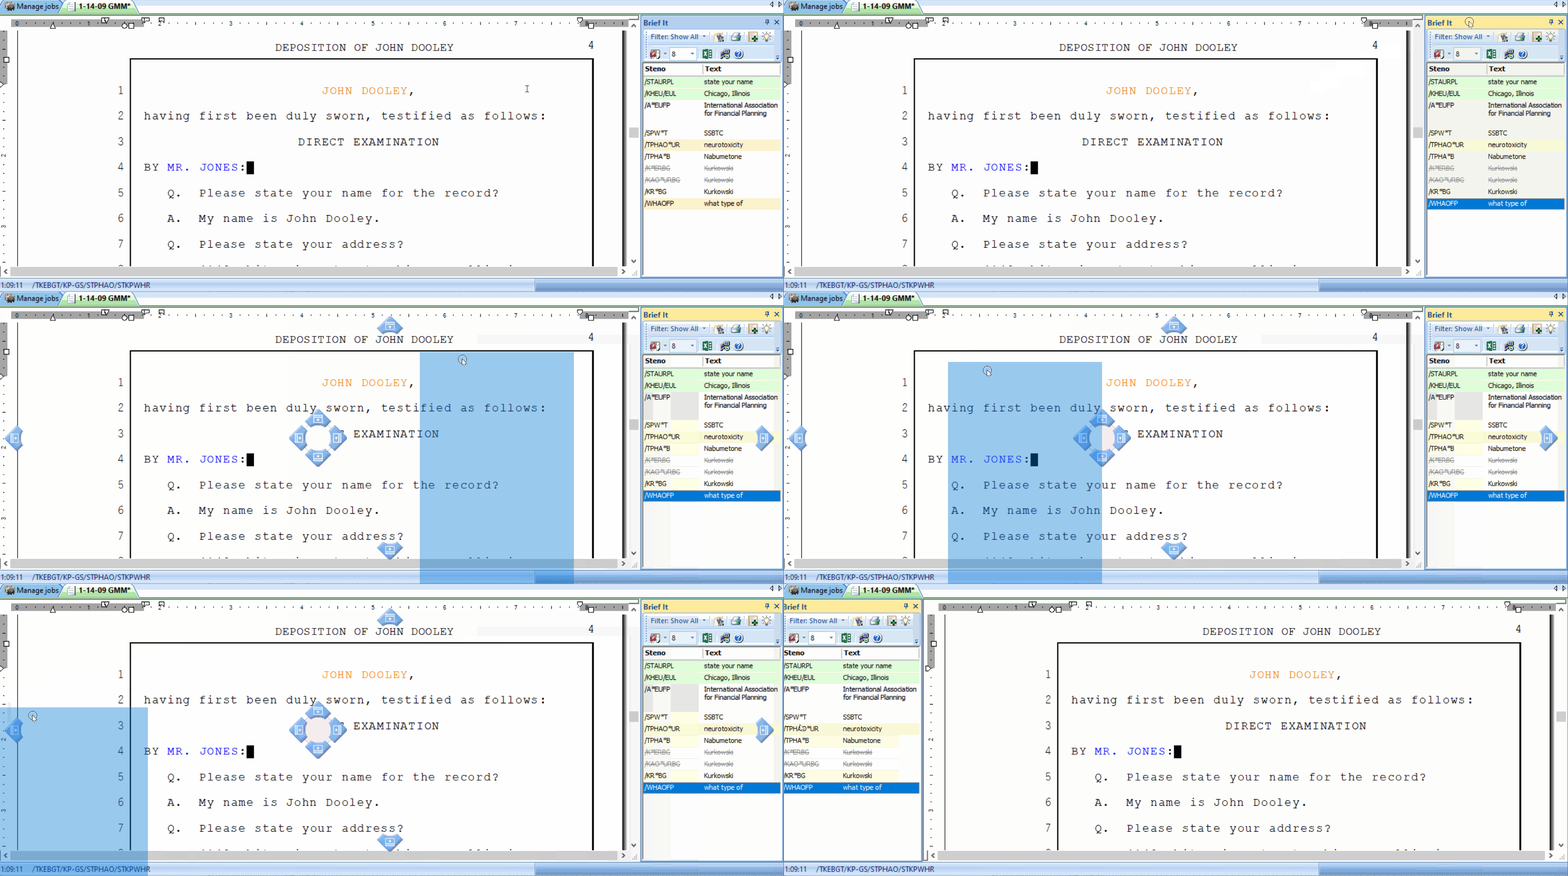
To move a dialog pane, click the Title bar and hold the left mouse button. As you move the pane, placement icons display on the screen. Single arrow icons display on each side of the screen and a multi-arrow icon displays in the center of the screen. These placement icons provide positioning options. Hover the cursor over an icon to view the new placement position. Release the mouse button to position the dialog pane in the new location.
Position On Screen Edge
Use the single arrow icon to position a dialog pane along an edge of the Case CATalyst screen. Click the Title bar of a dialog pane and hold the mouse button as you move the pane. Place the tip of your cursor on the single arrow icon for the desired screen location. A transparent blue box displays, indicating the placement position. Release the mouse button to position the dialog pane in the current location.
Position Next to Another Fixed Pane
Use the multi-arrow icon to position a dialog pane next to an existing fixed pane. Click the Title bar of a dialog pane and hold the mouse button. Place the tip of your cursor on one of the arrows in the multi-arrow icon. A transparent blue box displays, indicating the placement location. Release the mouse button. The moved dialog pane displays next to the existing fixed pane.
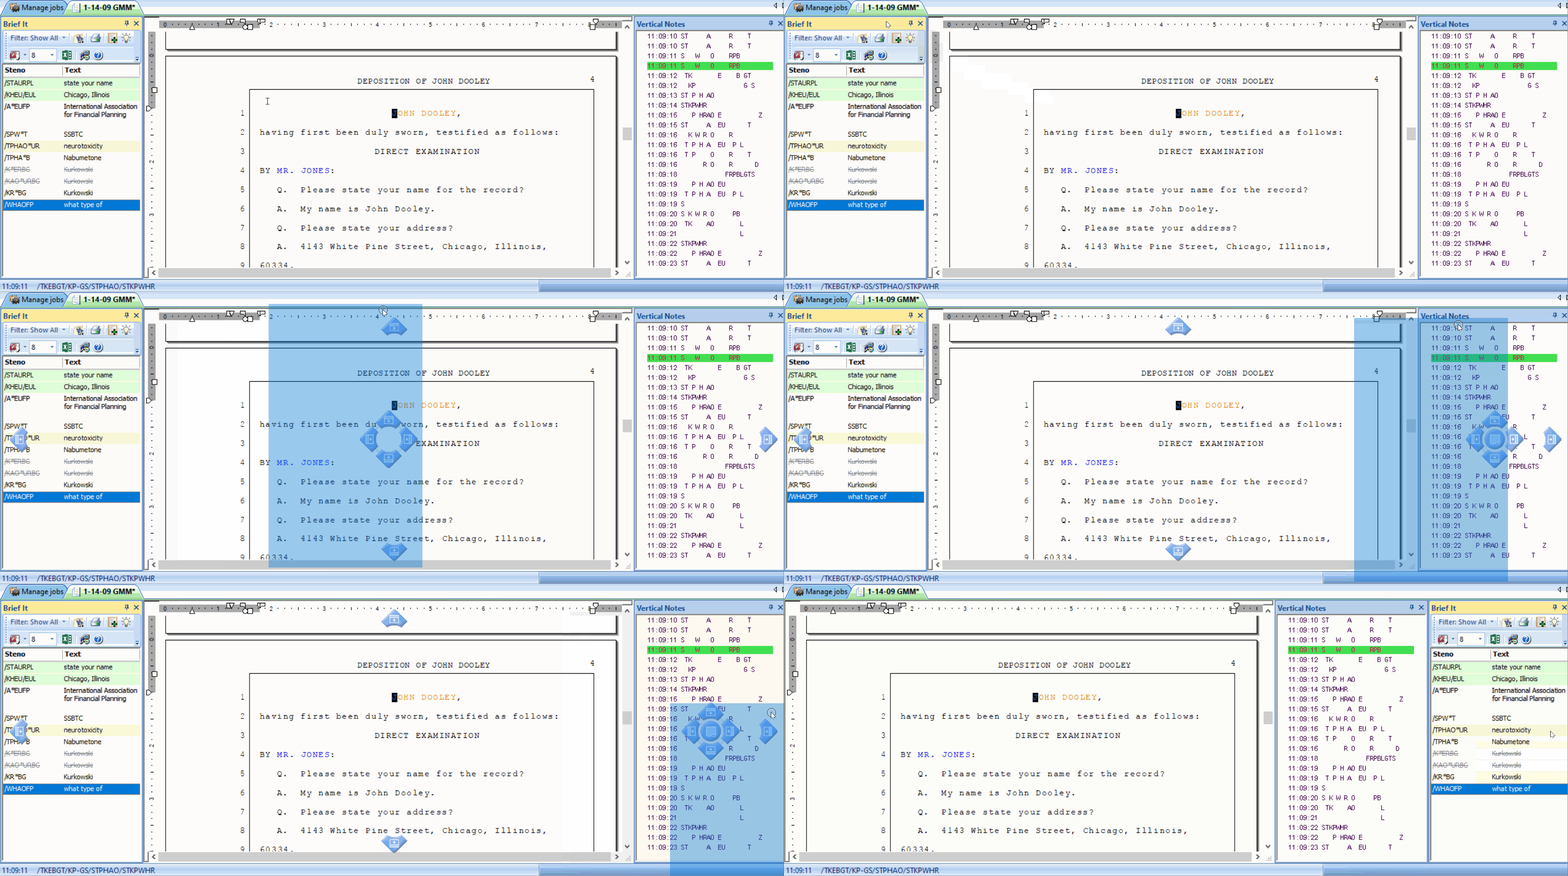
Position to Share a Location
Use the multi-arrow icon position fixed dialog panes next to each other within the same location. Click the Title bar of a dialog pane and hold the mouse button as you move the pane to the desired fixed pane location. The multi-arrow icon displays in the center of the stationary pane. Place the tip of your cursor on one of the arrows. A transparent blue box displays, indicating the placement location. Release the mouse button. The moved dialog pane displays in the shared space.
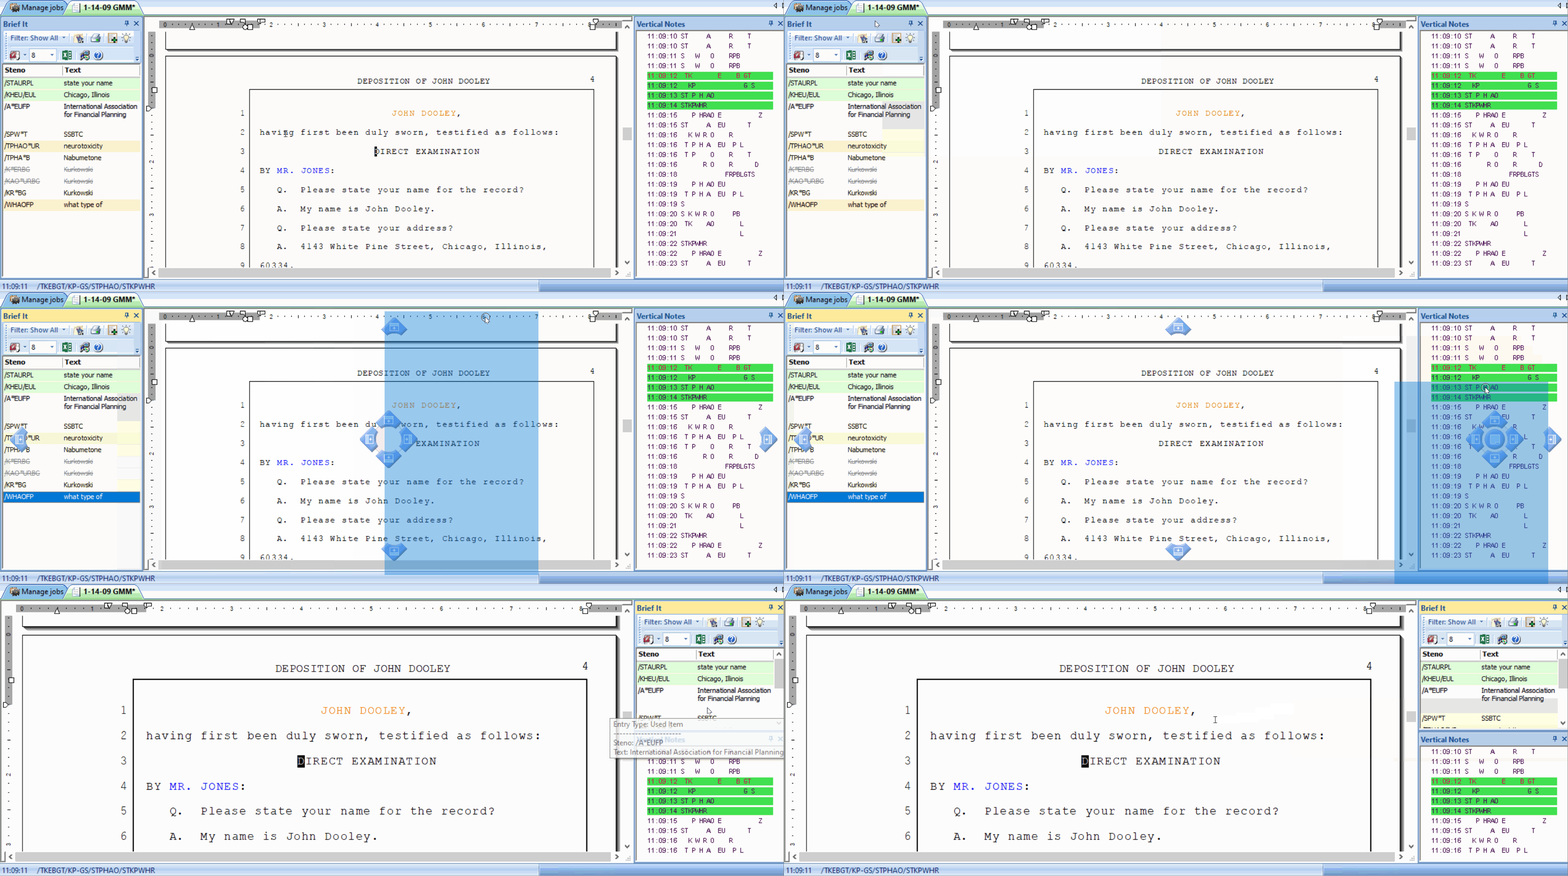
Position to Share a Location Using Tabs
Use the multi-arrow icon to position a dialog pane in the same location of another fixed pane and add tabs. The tabs allow you to toggle the display of panes. Click the Title bar of a dialog pane and hold the mouse button as you move the pane to the desired fixed pane location. The multi-arrow icon displays in the center of the fixed pane. Place the tip of your cursor on the center of the multi-arrow icon. A transparent blue box displays, indicating the placement location. Release the mouse button. Tabs are added for each pane in that location. If tabs for multiple panes already exist, a tab is added for the moved pane.
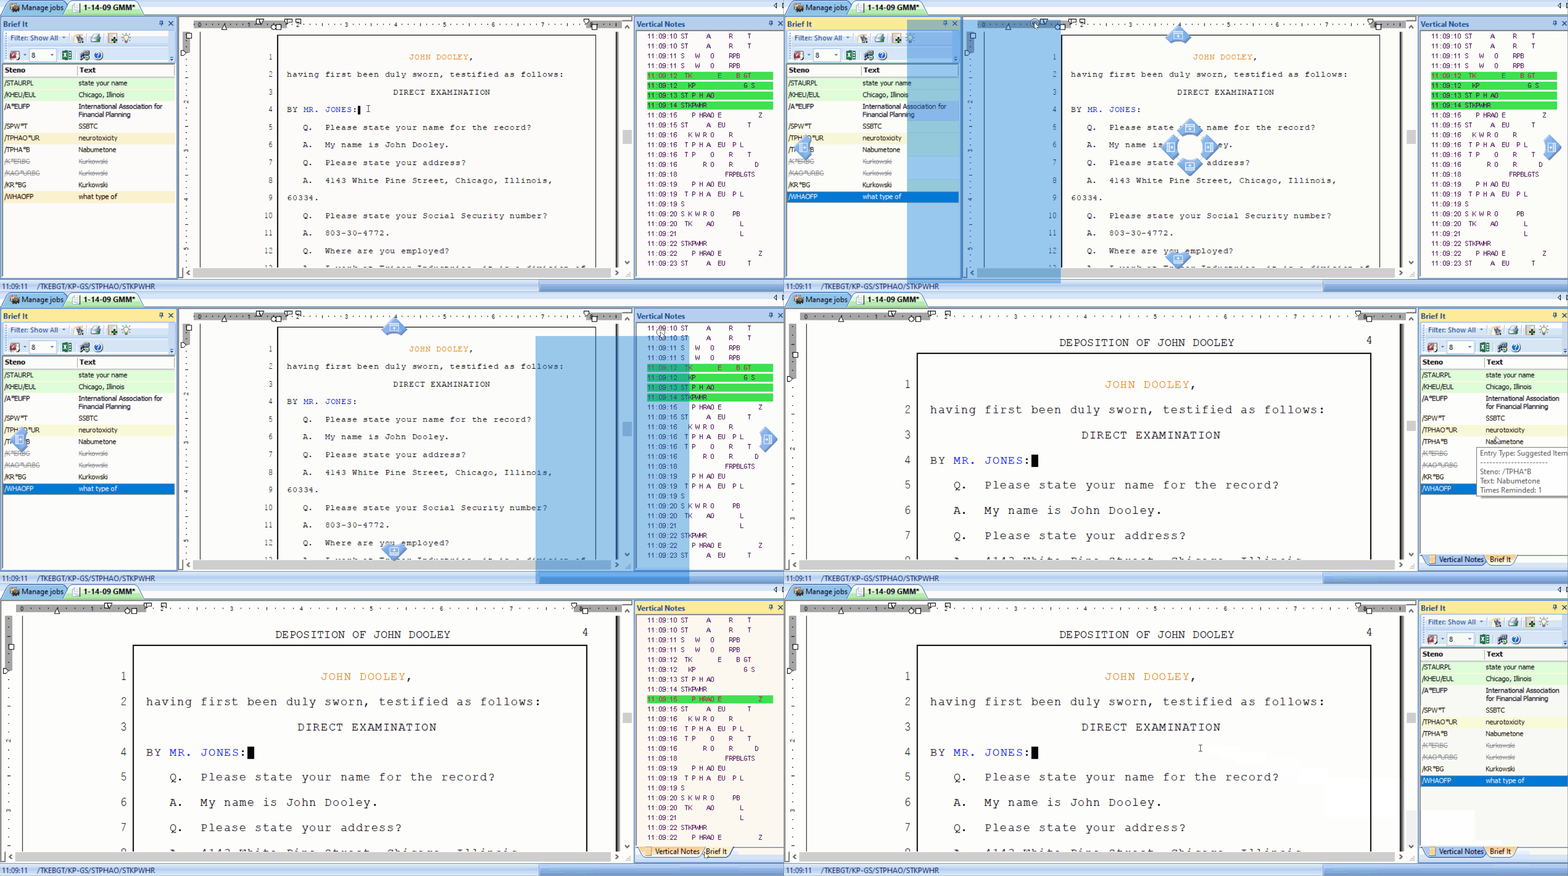
To separate an individual pane from a shared position, double click the dialog pane tab. The selected dialog pane displays on the screen where you can move it to a new location or close it. To separate all the tabbed dialog panes, double click the title bar of the open pane.
Floating Dialog Panes
You can place a floating pane anywhere on the Case CATalyst screen. A floating pane is not anchored to a location and may cover text or other screen items depending on its placement. To place the pane back to fixed position, double click the Title bar at the top of the pane.
