TrueView is a Luminex II™/Luminex™/Diamante®/Wave® auxiliary utility program that allows you to see a steno file along with the associated TrueStroke® data generated by the steno machine. TrueStroke data contains information about the direction of travel and velocity for each steno key in each steno outline. In CATalyst version 10.07 or higher, the TrueStroke data is automatically stored in the file’s Steno X-ray2 subfile and can be easily viewed by double clicking a stroke in the Vertical Notes. If you do not have CATalyst, use this TrueView utility to view your TrueStroke data.
Using the TrueView program, you can highlight a steno outline and see the direction of travel of the steno keys for the selected steno outline and see why the steno outline registered as it did. Whether you are an experienced shorthand machine writer or a student just learning, TrueView can give you instant feedback.
TrueStroke data is gathered while writing on your Luminex II, Luminex, Diamante or Wave. Remember, if you are writing realtime via a USB connection to CATalyst version 10.07 or higher or you read in a steno file from your steno machine, the TrueStroke data is automatically copied into the file’s Steno X-ray2 subfile and available within your CATalyst files. If you don’t have CATalyst, there are several ways to view the TrueStroke data using the TrueView Utility. If you want to write a new file and see the TrueStroke data, you can connect your steno machine via USB cable to TrueView and you can view the TrueStroke data for a currently open/realtime file. You can also “import” the TrueStroke information from files on the Luminex or Diamante’s Data SD card or the Wave’s memory. If you have copied files from the Luminex or Diamante’s Data SD card or the Wave’s memory to your hard drive, you can Open the Steno X-ray2 file and view the TrueStroke data for a file.
If you do not have TrueView on your computer you can download it here.
Using TrueView
-
Navigate to the location in which you copied the TrueView utility program and double click the program. The TrueView screen displays.
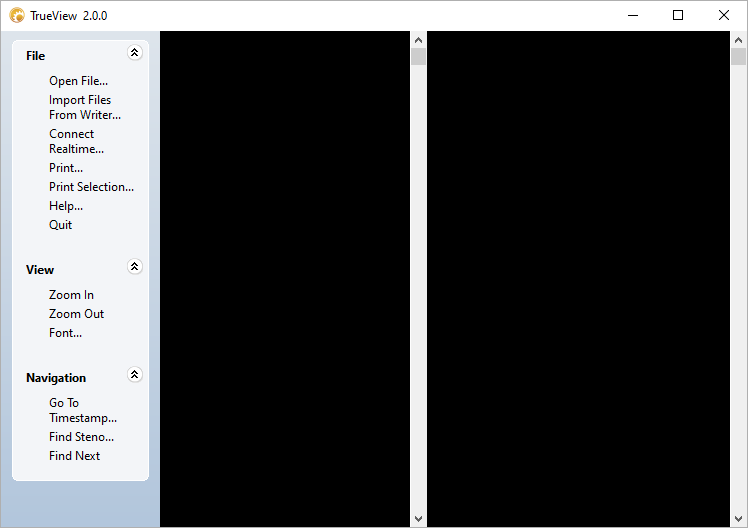
TrueView is divided into three sections: the far left section displays the menu and available commands, the steno note file displays in the middle section and the TrueStroke data (Steno X-ray2) file displays in the right section. To invoke a command, you can click the desired command or press Ctrl plus the activation key. All commands, except Font, have a shortcut command of Ctrl plus a character. For example, pressing Ctrl + o invokes the Open File command.
-
To look at the TrueStroke data, do one of the following:
-
To open an existing steno file that exists on the hard drive or removable media:
Click Open File (Ctrl + o). The Open dialog box displays.
Navigate to the location of the steno file and click Open (Enter). Go to Step 3.
-
To view the available files from the steno machine, make sure the steno machine is On and the USB cable is connected.
-
Click Import Files From Writer (Ctrl + i). Depending on the number of files on the steno machine, it may take a few seconds for the list of files to display.
The Diamante/Wave steno files are named by date and time and stored in Year Month folders.
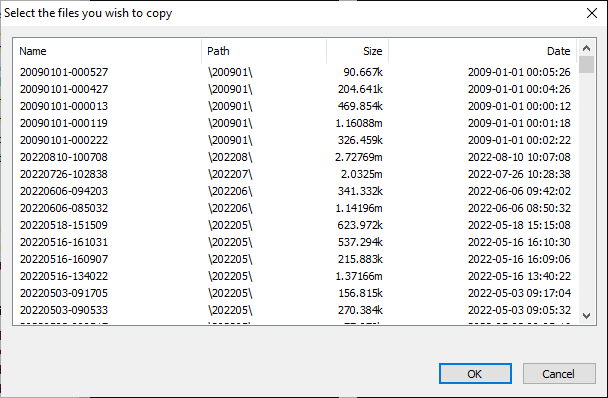
Once the Select the files you wish to copy dialog box displays, highlight the steno file you want to look at and click OK (Enter).
In the Browse for Folder dialog box, navigate to the location where you want to save the imported file and click OK (Enter). The imported file is saved in the selected location with the original file name.
At the Import Complete message, click OK (Enter). Go to Step 3.
-
-
To write realtime, make sure your steno machine is On. Connect your steno machine to your computer via the USB cable.
Write a stroke on the steno machine and click Connect Realtime (Ctrl + r).
In the Save As dialog box, navigate to where you want to save the realtime file and type a file name and click Save (Enter). Go to Step 3.
-
-
Once the selected steno file is displayed, you see a screen similar to the following:
In image below, you see the steno outline /STPHAO is highlighted in the vertical notes column. In the Steno X-ray2 column, you see the steno characters that were pressed for the Answer symbol. First you will notice the keys are a light gray color at the beginning of the stroke to indicate the keys are being pressed (going down), then you should notice the keys turn green which indicates they have been held down long enough and with enough velocity to register. As the keys are being released (going up), the keys show in a soft white color. In this example, you should also notice that not all the intended keys are pressed or released at the same time. The blue line is a close representation of TrueStroke’s registration of the keys as a complete stroke.

Do any of the following:
Zoom In (Ctrl - +) increases the display of the Steno X-ray2 data to its original size after using Zoom Out. Each time you select Zoom In, the display increases until it reaches the original size. The steno note section is not affected by the Zoom In command. Once it has reached the original display size, pressing Ctrl + + will have no effect.
Zoom Out (Ctrl + -) decreases the display of the Steno X-ray2 data in the event you cannot see the entire steno outline information without scrolling. The steno note section is not affected by the Zoom Out command. The Steno X-ray2 data will be compressed each time you select Zoom Out. Once it has reached the maximum compressed size, pressing Ctrl + - will have no effect.
Font... allows you to change the font type (other attributes, such as font size, font style, do not apply) for the steno notes and steno x-ray display.
-
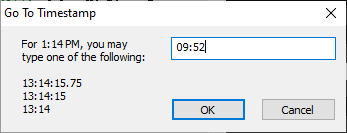
Go To Timestamp… (Ctrl + g) allows you to move your cursor to a specific steno outline based on the timestamp. You can type the entire timestamp or just the hour and minute and then click OK (Enter).
-
Find Steno… (Ctrl + f) allows you to move your cursor to a specific steno outline. Type the characters for the steno outline and click OK (Enter).

You need to type each character, in other words if you are searching for Mike, you would type PH for M, AOEU for long I, BG for final K.
If you need to indicate a final letter, type a hyphen (-) to indicate a final character.
Find Next (F3) repeats the current steno outline search. The search will continue to search and will go to the top of the file and continue to search.
Adjusting your steno machine:
If you are getting extra keys in steno outlines or are missing keys in steno outlines, there are several action items.
If, in either of the above situations, there are steno strokes that you continually misstroke and that misstroke cannot be defined as anything else, it is strongly recommended that you define the outline in your dictionary.
If you are using CATalyst or a CAT system that has a function that allows you to identify keys you tend or drag and/or drop, try selecting and indicating steno keys to take advantage of the Drag/Drop feature.
-
Increase or decrease the keyboard tension slightly. The keyboard tension wheel is located on the right side of the Diamante.
To increase the keyboard tension (increase the resistance), roll the wheel away from you or “up.”
To decrease the keyboard tension (decrease the resistance), roll the wheel towards you or “down.”
-
Increase or decrease the depth of stroke. The depth of stroke wheel is located on the left side of the Diamante.
To increase the depth of the stroke, roll the wheel away from you or “up”.
To decrease the dept of the stroke, roll the wheel towards you or “down".
- Please note: A steno machine set to the shortest depth of stroke along with the lightest tension makes you vulnerable to stacking or dragging a key or keys.
-
Try tilting the steno writer either slightly forward or backwards. The tilting mechanism is built into the bottom of the steno machine and does not require a tilting tripod.
If you are getting extra keys, try tilting the writer away from you.
If you are not getting some keys, try tilting the writer towards you.
To tilt the writer forward, position one hand on the back of the writer (not on the tilting LCD) and the other hand on the front just below the vowel keys. Gently lift the writer with the hand placed on the back and push down with the hand placed on the front below the vowel keys. To tilt the writer away from you, with your hands in the same position as above, gently lift up on the hands below the vowel keys and push down with the hand on the back. The tilting will be stiff to avoid having the machine changing while you are writing.
-
Keyboard options are available from the Opening menu (no job open), press Setup, More, Keyboard. Use the Up/Down buttons to highlight the desired option.
-
Keyboard Sensitivity—When your depth of stroke is very shallow, you may want to adjust the Keyboard Sensitivity option. Use the following guidelines to change the Keyboard sensitivity. It is strongly recommended that you select the first available setting and write a few jobs to assess the results. The default is Medium.
-
Do one of the following:
To make the keys less sensitive, for example, a key or keys show that you do not want in your steno outlines (shadowing)—select Low.
To make the keys more sensitive, for example, a key or keys you want are not in your steno outlines (missed or dropped)—select High.
-
-
Split/Stack Adjustment—When you experience splitting steno outlines or multiple steno outlines becoming one, adjust the Split/Stack Adjustment option. Use the following guidelines to change the Split/Stack. It is strongly recommended that you select the first available setting and write a few jobs to assess the results. The default is Balanced.
-
Do one of the following:
Split steno outlines show in your steno notes—select Less Splitting 1.
Steno outlines in your steno notes that are intended to be two separate strokes show as one—select Less Stacking 1.
-
-
Transition Time—When you experience stacking or splitting strokes, adjust the Split/Stack Adjustment option and write a few jobs first. If you modified the Split/Stack Adjustment option and continue to experience stacking or splitting strokes, change the Transition Time option. Transition time is the number of milliseconds that passes between the release of a key stroke and when the Diamante recognizes the next key stroke. Use the following guidelines to change the Transition time. Choose an interval setting between 2 milliseconds and 66 milliseconds. It is strongly recommended that you select the first available setting and write a few jobs to assess the results. The default is 8 milliseconds.
-
Do one of the following:
If split steno outlines continue to show in your steno notes—increase the transition time setting.
If stacked steno outlines continue to show your steno notes—lower the transition time setting.
-
-
Individual Key Adjustments
The Luminex II, Luminex, Diamante, and Wave allow for individual key adjustments. If you have made adjustments using the above instructions and you are still bothered by a key that is too sensitive (getting the key in steno outlines when you don’t want it) or not sensitive enough (not getting the key in steno outlines when you want it) you can individually adjust keys to be more or less sensitive.
-
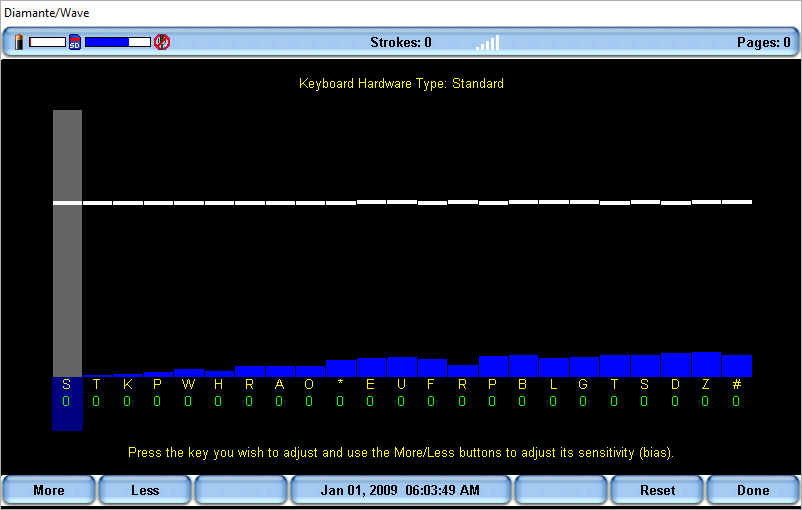
To make individual key adjustments, from the Opening menu (no job open) press Setup, More, Keyboard, Adjust Keys. Diamante owners, you can adjust your keys during the job by pressing More, Setup, Keyboard, Adjust Keys. Stenograph strongly suggests you make the adjustments before or after a job to allow for proper testing time.
-
The Key Adjustment screen displays. The white lines indicate the current transition point setting for each key. When you make an adjustment for an individual key, the white line will either move towards the bottom of the screen (more sensitive - less downstroke to make it register) or towards the top of the screen (less sensitive -- more downstroke to make it register).
To begin, press the key you want to adjust. You will see the blue bar display and when you release the key, a gray bar remains to indicate the key you are adjusting.
-
Do any of the following:
To make the key more sensitive (the key is not showing up when you want it to), press the More button. The white bar will move towards the bottom of the screen making the transition point earlier in the downstroke. It is suggested to move in increments of 5 when making a key more sensitive.
To make a key less sensitive (the key is showing up in your steno outlines when you don't want it to), press the Less button and move in increments of 10-15 which causes the white bar to move towards the top of the screen making the transition point later in the downstroke. The number below the adjusted key would display as a negative number, such as -10 or -15 depending on the adjustment.
To reset all the key settings to the factory defaults, press Reset.
-
When finished, press Done.
It is important that you test your key adjustments before taking your writer on a job. Stenograph suggests that you write a news program for about 20 - 30 minutes to verify your individual key adjustments are where you want them.
Troubleshooting:
Action: Connecting Realtime…, you get the following message:
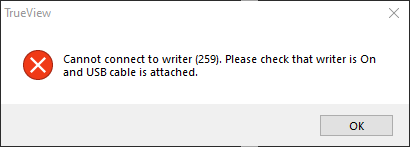
Resolution: If this is the first time you are using TrueView, please make sure the writer drivers have been installed. For more information on installing the drivers, refer to our Solution Center article Installing Stenograph Writer Drivers.
If the device drivers are installed, your writer is on, and the USB cable is plugged into both the computer and the steno machine, remove the USB cable from the steno machine, turn the steno machine Off and then On, plug the USB cable back into the steno machine and try the Connecting Realtime… function again.
Action: Connecting Realtime…, you get the following message:
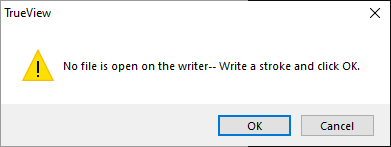
Resolution: TrueView sees the steno machine but cannot establish a realtime connection until a file is open. Write a stroke on the steno machine and click OK (Enter).
Action: Import Files from Writer…, you get the following message:
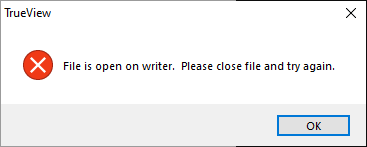
Resolution: The Import Files from Writer command copies saved files on the steno machine to the hard drive. No files can be open on the steno machine. To import files, click OK (Enter), End the file on the writer and try the Import Files from Writer function again.
Action: USB cable disconnected, you get the following message:
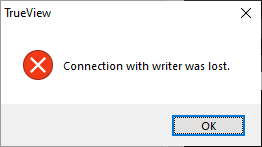
Resolution: This indicates that TrueView has stopped receiving the realtime feed. You will need to re-establish a connection. Reconnect the USB cable, click OK (Enter) to dismiss the message and then click Connect Realtime (Ctrl + r). If you get the Cannot connect to writer (259)… message, click OK and then press Ctrl + r again. Follow the previous instructions for connecting realtime.
Action: Pressing End on writer, you get the following message:
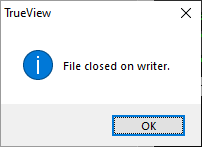
Resolution: You have ended the realtime connection and TrueView has stopped receiving the realtime feed. You will need to re-establish a connection. Write a few strokes on the writer and then select Connect Realtime … (Ctrl + r). Follow the previous instructions for connecting realtime.