Changing Sound Settings to Default Devices
After installing the Stenograph Virtual Audio cables either through the CATalyst Updater or installing CATalyst version 22, Windows will set them as the default Playback and Recording devices. This means you will not be able to hear any sounds on your computer until you change the audio back to the default devices.
Here is how to change your Input and Output settings back to their default sound devices.
Windows 11
-
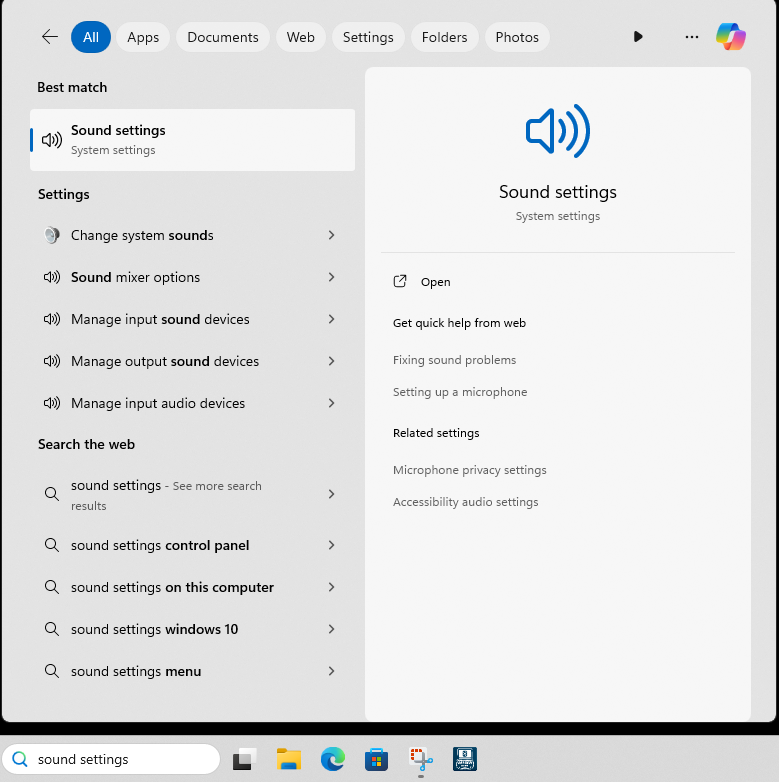
In the Windows Search bar, type “Sound Settings” and press Enter.

-
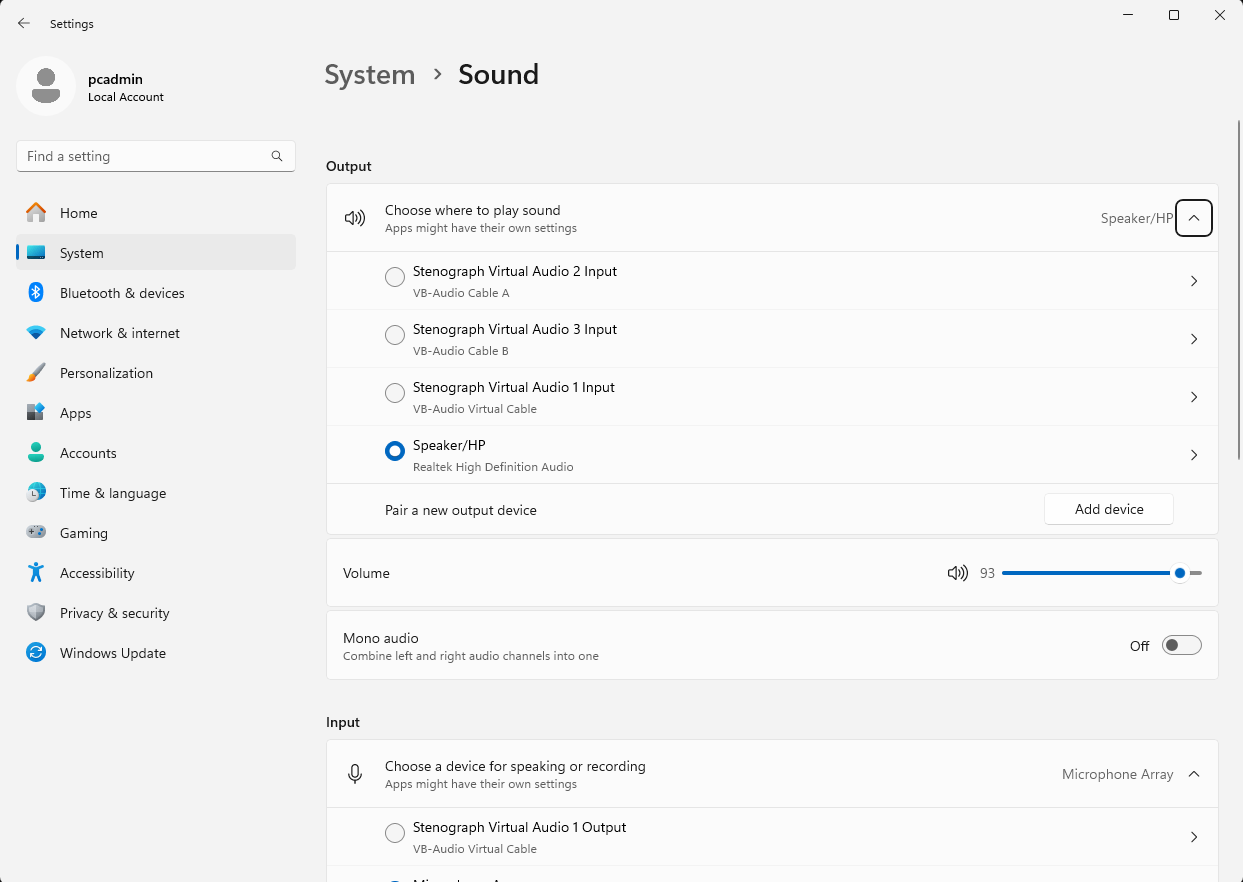
The Sound Settings window displays. On the right side under Output, click the dot next to your output audio device. The device might have the words “Speaker” or “Realtek” in the name.

Scroll down and find Input. Then click the dot next to your input device. The device also might say “Realtek” or “Microphone Array”.
Close the Sound Settings window.
Windows 10
-
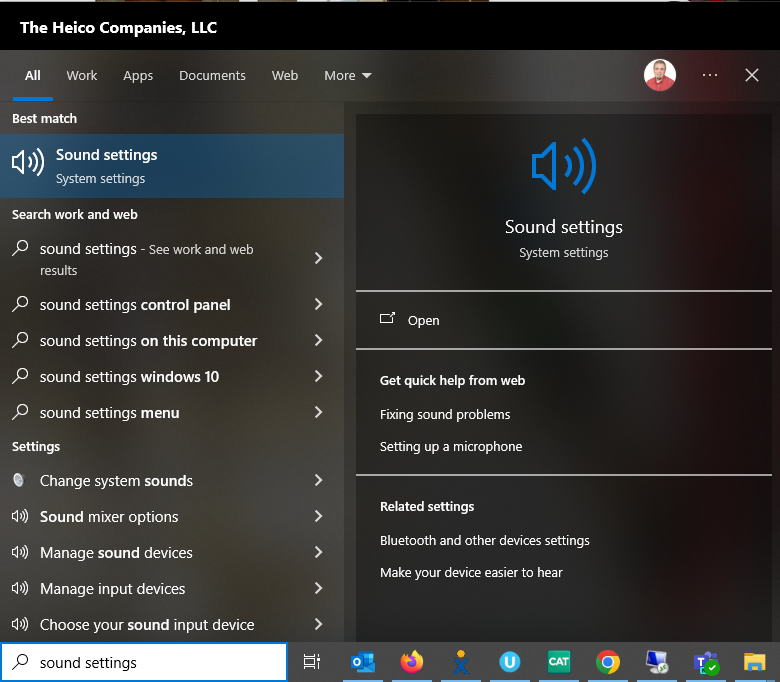
In the Windows Search bar, type “Sound Settings” and press Enter.

-
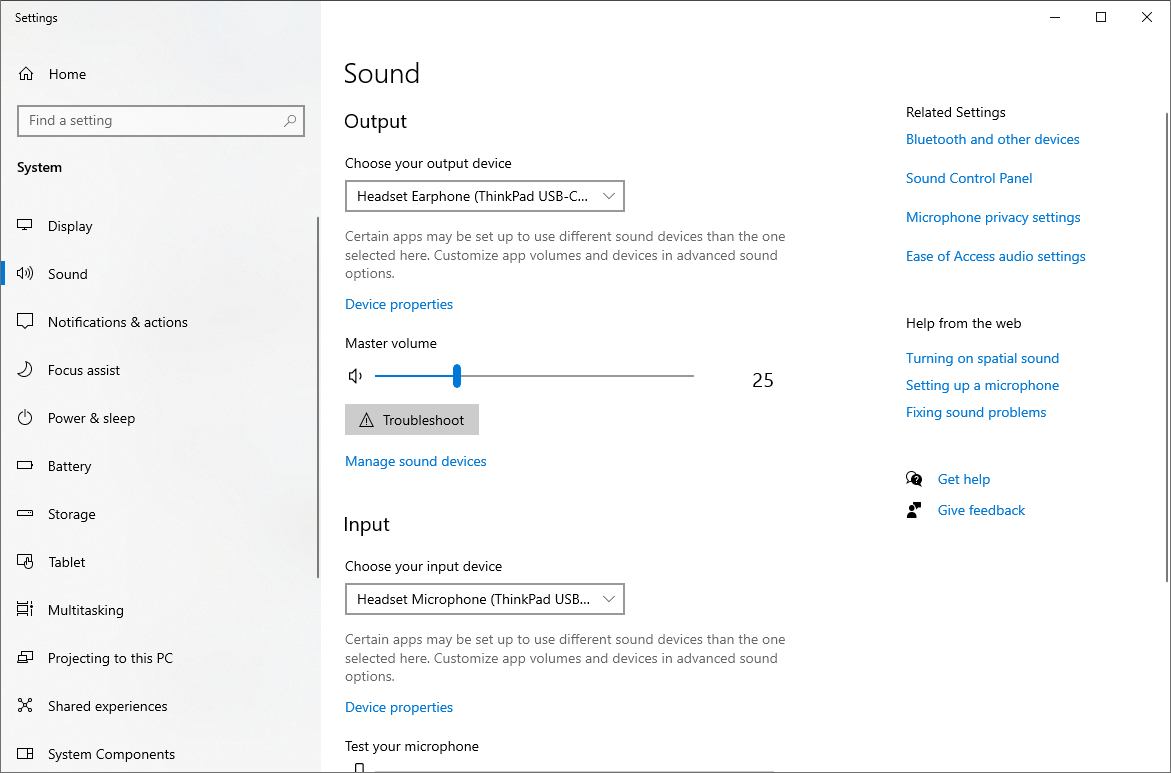
The Sound Settings window displays. On the right side under Output, click the drop down menu and select your output audio device. The device might have the words “Speaker” or “Realtek” in the name.

Scroll down and find Input. Then click the drop down menu and select your input device. The device also might say “Realtek” or “Microphone Array”.
Close the Sound Settings window.